
Are you an Android user and love rooting as much as every other Android user does? And you happen to be having a LG Nexus 4 too? LG Nexus 4 is the best Android device till date that is released by the LG – Google combo. It is bundled with a quad-core processor and Android 4.2. And with rooting done, the possibilities are numerous. On rooting, you will be getting the root access to your Nexus 4, get the chance to install ultra cool root-only apps like Titanium Backup Pro and a lot more. The benefits that one gets on rooting an Android device are unimaginable and numerous.
But before rooting, there is something that everyone needs to remember too. Rooting your Android device will surely void your warranty. But you can always un-root your Android device to get back the warranty. If your Android device happens to go through any problem during rooting or after it, your device manufacturer will not be liable to repair the model even if it is in the warranty period.
Google (LG) Nexus 4 Rooting Guide
Rooting your Nexus 4 is far easier than you might imagine. To root your Nexus 4, the things that you need are – Nexus 4, Windows computer, micro USB cables, Android SDK file, CF-Auto-Root by Chainfire. Android SDK and CF-Auto-Root are downloadable files that you will be downloading very soon.
Steps
1) First, before rooting, it is suggested that you backup all your personal data in your Nexus 4. You should safely copy your photos, videos, apps, and everything else that concerns you to your computer.
2) Next, you should enable USB Debugging on your Nexus 4. This can be done by heading to Settings > Developer Options > USB Debugging.
3) Download Android SDK files. These files provide an environment for your Nexus 4 to communicate with your Windows computer.
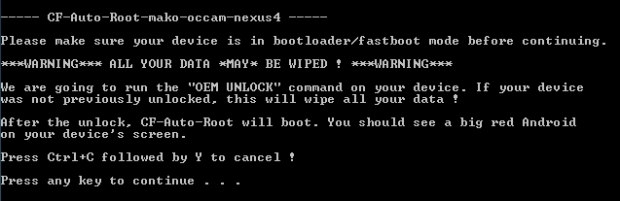
4) Download the CF-Auto-Root by Chainfire. This is the actual root package needed for your Nexus 4. Once downloaded, extract that safely to Windows desktop or any other place of your choice.
5) Switch off your device and then put your Nexus 4 in the fast boot / boot loader mode by pressing the Volume Down and the Power buttons simultaneously This will put your device in the fast boot mode.
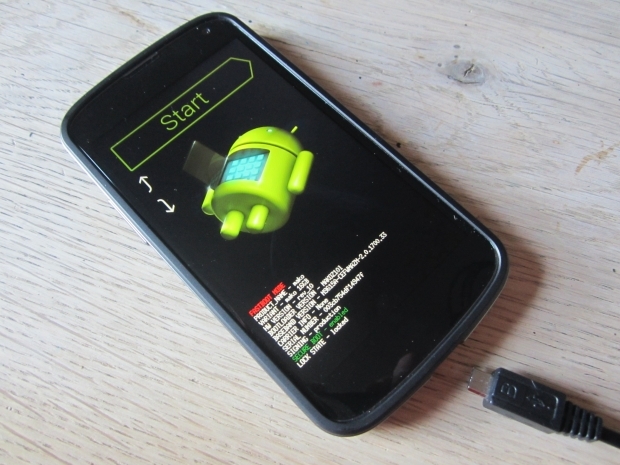
6) Connect Nexus 4 to your Windows computer using micro USB cables.
7) Run the “Windows.exe” file that is mentioned in the CF-Auto-Root by Chainfire folder, that we extracted a little earlier. A windows command prompt like window opens up and the process begins.
8) Wait for a few minutes and your Nexus 4 will be rooted. Now enjoy the best of Android!
If you found this post to be helpful, please make sure to share this post with your friends too. Feel free to throw questions on the comment section below.


0 comments:
Post a Comment