You might ask, “What was the need to write a rooting tutorial for the same device?” Well, the question is valid but the answer will sound to you even more valid if I tell you about the development of a much easier rooting toolkit that makes the procedure very smooth-going for all.
The older method involved issuing a set of ADB commands via Windows command box and was a little complex, especially for the new and average users. The rooting tool kit has been tested and found working fine on Xperia Z with the following stock Sony Jelly Bean firmwares: 10.1.D.0.317, 10.1.D.0.322, 10.1.A.1.350. The procedure works on both locked/unlocked bootloaders.
Disclaimer:
The procedure described below is considered risky and might your phone’s warranty. Proceed only if you understand the gravity of your action. Neither the developers of this method nor we, at DroidViews, will be responsible for any mishap. It’s you money, your phone, your move!
Getting Prepared:
Before you set out to actually root your Xperia Z, you need to make some preparation first.
- Download the rooting toolkit on your computer and and extract the files. Make sure the extracted folder is placed on theC:\ driver of your PC: EasyRootingToolkit_XPERIA-Z_SO-02E_v101_tkymgr.Zip
- Charge your phone to have at least 50% battery level.
- Open Settings> Display> Sleep on your phone and increase the screen timeout to at least 10 minutes.
- Also, enable USB Debugging on your Xperia Z: go to Settings> Developer Options and check the USB Debugging option here.
- You will have to check/turn on Unknown Sources option from Settings> Security.
- Backup your contacts, messages, APNs, bookmarks, calendar, apps & games Using These Apps.
- Download and install Sony FlashTool Drivers on your computer. If you already have it installed, skip this step. In case you are unable to install the drivers on windows 8, you will have to make some changes to be able to install the drivers. Press Windows + R keys on your PC’s keyboard. You will see a cmd box. Now copy and paste the followingcommand in the box and click OK:
shutdown -o -r -t 0
- Doing this will restart your computer in Advanced Startup menu. Select the “Disable Driver Signing” option here. Then choose the “Have disk” option and install the Flashtool driver manually. Now reboot your computer.
Cracking the Nut: the Rooting Part
If you have done all required things describes above, you can now proceed to root your Xperia Z by following these steps:
- Close/exit all applications on your computer like the PC Companion and FlashTool, that use ADB drivers.
- Now connect the phone to the computer using USB cable that came with your phone and open the Xperia Z rootingtoolkit folder. Run and execute the “runme.bat” file. (Make sure all extracted files are present in the same folder).
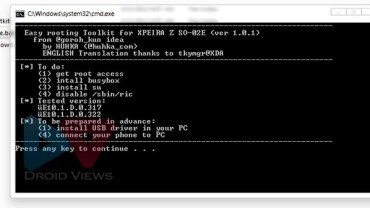
- You will see a command popup window asking you to press any key. Be obedient and press the Enter key. Now thetoolkit will start executing all four “To do” steps one after another.
- When it is done, you will be asked to “press the button to restore the data in your phone“.
- Just as you press a button, you will see “Restore Data” option of your phone’s screen. Select it.
- When you see “if Restoring data is complete,“ in the command prompt, open the phone app and dial *#*#7378423#*#* on the keypad.
- You will the Service Menu of your phone, select “Service tests” from the available options.
- Now select “Display” (screen will turn white), the toolkit will now start executing some commands.
- Now press the Power button to turn off the screen, wait for few seconds and press the Power button again in continuation till you hear a beep sound. Keep observing the command prompt for outputs.
- Then you will see “transfer files to your phone part2“, “installing busybox,su,Superuser,etc…“.
- Finally, you will see “Cleaning up“ on the screen and then the phone will reboot automatically and when it boots, it should be rooted.
To verify the root, you could check for the presence of the SuperSU app among the list of installed apps on your phone. Open the app and update the binary if required. Additionally, you can install the Root Checker app from the Google Play and run it.


0 comments:
Post a Comment